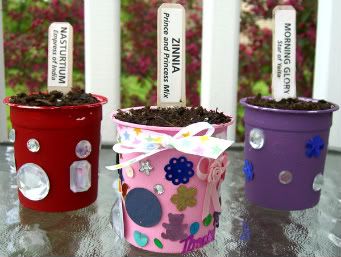
These precious little seed cups make a great gift for Mom... any day, or for Mother's Day!
SUPPLY LIST:
- empty yogurt-sized containers (mini or regular size)
- popsicle sticks (one for each yogurt container)
- dirt (just enough to fill each cup)
- flower seeds or small annual plants
- glue or tape
- sisors
- acrylic paint
- embellishments (scrap paper, rhinestones, glitter, ribbon, buttons, beads, glitter-glue, confetti, stickers, etc)
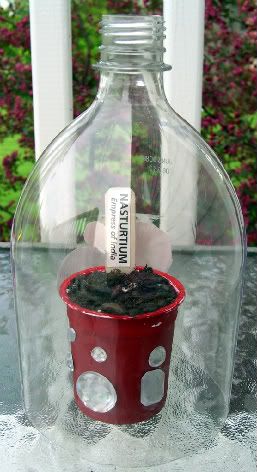
- empty 2-liter bottle (*optional to create mini green house)
DIRECTIONS:
1) Wash out an empty yogurt-sized container and dry thoroughly.
2) Paint the container using acrylic paint, set aside to dry.
3) Embellish the container with (scrap papers, rhinestones, glitter, ribbon, buttons, beads, glitter-glue, confetti, stickers, etc). *If your container has a plastic lid, consider decorating to use as dish underneath pot.
4) Set decorated pot aside to dry.
5) Fill pot with potting soil.
6) Plant either seeds or small annual flowers and water.
7) Use a popsicle stick (or something similar) to label what you have planted, and stick in pot.
8) *Place decorated lid beneath pot (to act as dish).
9) Give Potted plant to Mom for Mother's Day! :)
DESIGN SUGGESTIONS:
- Explore patterns when embellishing your pots.
- Create a spring-theme (bunnies, flowers, bugs, butterflies, etc).
- Write a Mother's Day message on your pot.
- Use the empty seed packet you planted as an embellishment on your pot!







2 comments:
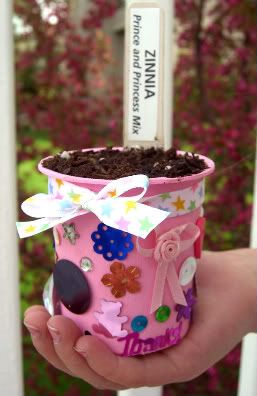
The Mother's Day Seed Cups, were a fun project! The only thing we purchased for this project were three packets of seeds (one packet of seeds per cup- we needed three because we made three seed cups). The project was enjoyed by all three children, ages 4/7/9. The great thing about this project, too, is it is now ongoing. The kids LOVE to water the seed cups and they will LOVE LOVE to watch them sprout and GROW! Serena, my four year old, randomly added treasures (gems, sequins, bows, buttons, etc.) to fill the space on the pink cup she painted and then she planted a pink/yellow Zinnia. Then she wanted it finished off with a ribbon tied in a bow. Travis, my seven year old, painted his pot red and added all white gems (in a pattern: 2 gems-space-2 gems-space). He planted red Nasturtium. Marissa, my nine year old, painted her cup a shade of purple and added white gems, blue flower sequins, and white sequins in zig-zag pattern. She planted purple Morning Glories.
They used Trix kids yogurt cups. My kids all wanted to paint their cups to give them bright spring colors. We actually did this on the terrarium part of the project. We used a 2 L pop bottle and cut the top half off to use for our project. The pop bottle had the plastic pop label we removed before we cut the bottle, but one side had the glue and label remnants we couldn't get off, so the kids added flower photos (we used the flower seed packets, but you could also use pictures from a gardening magazine, etc.) to the one side of the terrarium and it looks really cute. You could add some of these randomly to the pop container, but of course, I would keep these to a minimum, as to let the sunshine in. We had left-over plant sticks (from my teaching), so we used those, but popsicle sticks would work, as well. We cut the names off the seed packets and glued them on, but you could write them on, as well. You could also paint the sticks and/or decorate the sticks. The kids are so PROUD of their creations they made for me~!
- Susan
This is a great Mother's Day gift. We especially like it for because young children can get involved too!
Will definitely be sharing it on our site!
all the best,
Sherry + Wendy @ Kiboomu
Post a Comment